Art on Skye

trails-guide-2
The Skye Arts Trail

Other than sheep, the Isle of Skye seems to have an abundance of talented artists, photographers, sculptures, potters and weavers.

The Skye and Lochalsh Arts and Crafts Association produce a wonderful book detailing galleries and studios throughout the Island, their location and the types of work on display.

We have used this guide over the past couple of years to visit many of these and of the 42 artists and galleries features in the guide we have visited or seen the work of over 30 and detail our highlights below:

skyscape

Skyescape Gallery

Skyescape Gallery is situated on the Harlosh Peninsular and features work predominantly by Russell Sherwood – owner and founder of the gallery – but also by a few other carefully selected photographers. We fell in love with Russell’s work the first time that we saw it being displayed in Dunvegan and had to make the trip to his gallery to see the quality of his other work which we found to be wonderful too. .

Russell is very welcoming and more than willing to impart advice and information on the equipment he uses and his workflow. He also offers tuition for a fee and although we have not used his services can only imagine that this is great value for money and worthwhile to employ his services.

Russell is a member of F4 – four likeminded photographers whose work is dominated by the landscape of Skye.

tim wilcock

Tim Wilcock Photography

Tim and his wife run the Grasmhor Bed and Breakfast near Dunvegan and in addition Tim is also a talented landscape photographer. Tim’s work can be seen at the bed and breakfast where he has a small gallery and like Russell Sherwood, is more than happy to discuss how and where he captures his images.

Tuition is also available which I can only imagine is superb and good humoured.

Tim is also a member of the F4 collective.

deandelion design

Dandelion Designs and Images Gallery

This gallery is situated in the beautiful, small village of Stein on the Waternish peninsular next door to the Stein Inn – Skye’s oldest Inn.

It features the work of several artists – Liz, Pat and Cathy Myhill predominate but there is also work on display (and to buy) by John Viles and Marion McPhee to name but two. We were particularly struck by the work of Liz Myhill who produces some beautiful and arresting art.

ellishadder

Ellishadder Art Café

One of our absolute favourites not just for the amazing food and drinks and service but also but the wonderful art work created by Stuart and Maggie Quigley the owners and operaters of the Café.

Stuart produces some stunning paintinsg and pencil drawings of Skye and Maggie weaves amazing rugs which are works of art in themselves.

Again, as we have found with most artists on the Island they are more than happy to discuss how they create their work and it really hits home how much work actually goes into their creations.

skeline

Skyeline Ceramics

Skyeline Ceramics is situated in a very small workshop in Broadford. The workshop is renowed for the exquisitely crafted sculptures of sheep. The attention to detail is amazing and each of the small creations is unique giving them their own personality.

john bathagte

John Bathgate – Dun Studio

John Bathgate’s studio is just outside of the town of Dunvegan and is a treasure trove of beautifully painted scenes of Skye. John is great company and, like most artists on Skye is happy to share his inspirations.

John uses various media including acrylics, oil, mixed media and collage to capture the atmosphere and grandeur of Skye’s landscape. His work is available in original form and limited edition prints.

WoodrisingGallery_Inside

Alan Campbell

Alan is an incredibly gifted photographer based in Broadford. He exclusively uses medium format film to capture both dramatic and atmospheric images.

When you look has his work you appreciate the increased dynamic range and wonderful colour that it seems only film can capture.

ng-6

Nigel Grounds Gallery

Using bold, dramatic colours Nigel’s paintings are stunning in the way they capture Skye’s landscape. His gallery is probably the first you will encounter after leaving the Mallaig to Armadale ferry – it is literally 100 metres on the right hand side as you head towards the main road.

Nigel regularly exhibits his work in galleries across Scotland.

These are just a handful of the artists and photographers we have visited and our favourites so far. There are many to discover and we look forward to doing this on our future visits to Skye.

Links:

http://skyescapegallery.zenfolio.com/
http://www.timwilcock.com/
http://www.dandelion-designs.co.uk/
http://www.ellishadderartcafe.co.uk/
http://www.skyelineceramics.com/
http://www.dunstudio.com/
http://alan-campbell.com/
http://www.nigelgrounds.co.uk/

One Camera, One Lens – The Evolution

Unknown

Canon 5D and 24-105L

Around three years ago I lugged with me the following whenever I went on a day trip or vacation with the family:

– Canon 5D Mk2
– Canon 24-105L
– Zeiss 35mm
– Zeiss 50mm
– Zeiss 21mm
– Canon 430EX
– Filters
– Ipad

I had on hand – other than for wildlife photography – a lens for most occasions: landscape, portrait (the 24-105 was pretty good for this), walk around, architectural. All were catered for with some of the best glass that money can buy along with a fantastic body incorporating the a full frame sensor in the shape of the 5D Mk2.

What was not to like? Well, as I have mentioned in previous a blog, the biggest downside was the weight and bulk.

We would regularly take two trips to Canada and the States each year and from where we live this would invariably involve two or three flights. This big bag of camera gear had to be lugged on and off various aircraft with three tired children to manage and cajole with their assorted paraphernalia.

And then it got to the point where I didn’t want to carry this bag with me at all and so the decision was made was to downsize but get the best “small” camera I could that would rival the 5D’s full frame sensor and the quality of the Zeiss optics.

DSCF3210

The M9 followed the 5D Mk2

The way to go? Leica (of course!). So I assembled a system around the Leica M9 with a 50mm Summicron, 35mm Summarit and 24mm Elmar. This little lot in small Billingham bag came to around half of the weight of the Canon/Zeiss kit in a much smaller bag. Oh and probably cost around twice as much! initial review of this camera is here: http://wp.me/p1hetB-as

I used the M9 for around 6 months. From an image quality perspective I will still say that in the right conditions it gave me the best “look” I have ever had from my photographs. Sharpness, contrast and colour were all superb. The Leica glass really lived up to it’s legendary reputation.

The M9 with it’s quirks – average sensor, poor screen, poor high ISO to name a few – was fun to use and really reconnected me with photography. It slowed me down and made me think a little more about shots.

But then the frustrations started. Whilst the size of the camera and the associated lenses meant I could take it anywhere I realised that I was missing more shots than I was getting. As I said above the majority of my photography takes place whilst vacationing with the family. It is one thing taking your time for a landscape shot but quite another taking pictures of the children playing, running or even moving.

Also, If the light wasn’t right getting focus was a pain using the rangefinder.

Also, when changing lenses the M9 seemed to attract more dust and dirt on the sensor than any other camera I had owned (it doesn’t have any form of dust reduction system) and post processing to remove the spots and splotches was becoming a chore.

So, despite the superb image quality and lightweight yet another system’s flaws start to outweigh the benefits……

fujifilm-x-e1-18-55mm-f2_4

Fuji X-E1 and 18-55 Lens

And so the M9 went and the 5D Mk3 was ushered in with history quickly repeating itself over size and weight. Eventually it was replaced by the Fujifilm X-E1 and 18-55 lens a review of which can be read here: http://wp.me/p1hetB-eY

The system fit the bill in terms of size and weight and now, owning one camera with one lens (albeit a zoom lens which offers a degree of flexibility) I am liberated.

Everything is simplified. No longer is there a requirement to consider which lens for which shot. With the Fuji 18-55 ( 27-82mm 35mm equivalent) lens, I have found is good enough for 99% of the situations I find myself in and the images I want to capture. From landscapes to portraits to cityscapes I have never felt short changed.

Admittedly it is not appropriate for sports or wildlife but for most other situations it is fantastic.

No more worry about dust or dirt on the sensor. Not happy with the field of view? Be more creative and find an interesting new one.

The other issue I had with all the lenses I used to own is that I was always looking for the next one to buy. One that could fit into a small segment of photography be it macro, portrait, wildlife, super wide angle etc. GAS (Gear Acquisition Syndrome) is a very expensive condition that always makes you feel as though you need that next fix, err lens.

Now I am happy with the one lens – if it doesn’t do exactly what I want I consider a way round it. I have enjoyed photography more than ever and for me, the sheer enjoy,eat of capturing an image you are later proud of, is what it is all about.

Conquering Taft Point – Well Sort Of…….

IMG_8929
Taft Point – The View

After an hour and a half of pushing, pulling, straining and heaving I felt as though I had done an extensive work out at the gym. My arms and shoulders ached from the exertion and I greedily drew in deep lung fulls of the thin mountain air. According to the sign to my right we had come half way along the trail in twice as long as the guidebook suggested. After a few mouthfuls of water I pushed on.

What now seems in hindsight a slightly foolish idea, I had taken it upon myself to push my 10 year old son in his wheelchair along a trail situated at the side of Glacier Point Road to Taft Point in Yosemite National Park, California. My boy has Cerebral Palsy which affects the movement in his arms and legs and consequently his only form of mobility is his wheelchair.

The guide book I had read back at the hotel that morning over breakfast suggested that it was an “easy” hike. Easy on two feet maybe but taking myself and the four wheels of a wheelchair was an entirely different story. I soon discovered that the trail was more challenging than I had thought.

This is where most guidebooks fall down in my opinion. They seem to be written from the perspective of the single traveller or a small group. There is little account taken for those whose mobility maybe limited or the brave family dragging their gaggle of children through the backwoods of America.

Admittedly we weren’t in the back woods – there are too many cafes, souvenir shops and visitors centres to give you the feeling you really were in the middle of nowhere.  But it strikes me that this kind of information would more than useful – if only so that you know it is possible to traverse a trail with a pushchair for example. It certainly would have been useful for us in any case.

My wife and two other children aged 11 and 3 pushed on acting as reconnaissance to any new and interesting barriers that we may come across. They would shout back about what to watch for and then stand there at what seemed some impassable point on the path.

“You’ll never get through this part” they would say.

“Just watch me” I would retort.

“Are you sure, Dad” my son would ask quietly. “No,” I would admit next to his ear so the other’s couldn’t hear. “But let’s give it a try, shall we?” He would smile, the cue that he was happy to let his crazy father bounce him over and through the next obstacle.

There was a good deal of flat ground that meandered through stunning trees and calm wild flower filled meadows, however, the large rocks and boulders that occasionally filled the path forced us to take stock and work out a route over and  around these obstacles and this slowed us considerably. Once the chosen route was decided we bumped and wobbled our way through, on occasion scraping away at the metal of the wheels of the wheelchair.

One particularly awkward challenge was stream with it’s steep embankments to traverse. The wheelchair tipped this way and that at precarious angles. The cool waters of the stream eased my and weary feet as we paddled through. My son to his eternal credit gave only words of encouragement as he tenaciously gripped the arms of his wheelchair.

Occasionally, fellow hikers would stroll past do a “double take” and offer help out what most have looked like a slightly deranged father and family needlessly putting themselves through hell. Especially as some of them will have been aware that Glacier Point, with it flat easily accessible tarmacked paths, café selling food and cool drinks and safely walled look out points, was only two or three miles up the road. I guess it pays to read the guidebook a little more carefully in future and plan these things with a little more thoroughness.

We were reliably informed that the effort was going to be worth it and were complimented more than once for our tenacity. I have always had the philosophy that I will not let the wheels of my son’s wheelchair stand in our way on vacation. I have always found that the extra effort always pays off.

After the arduous and strangely fulfilling upper and lower body work out of the trail we eventually arrived at the top of a hill, the midday sun beating down on us. We looked down to where the path opened out to a huge flat area and then elevated towards the “point” where a lone piece of railing was the only structure that stood between you and a 3,000 feet drop.

With a tinge of disappointment, I looked at the steepness of the path and the way it twisted and turned horribly and realised that I had come as far as I could do. I was confident of getting him and his wheels down to “the Point”, however, in the thin air at the 7,800 feet elevation and the heat of the sun I was less than confident of getting in back to where we now stood, never mind the car.

At that point, a quick decision was made and I reversed him under the shade of a tree for shelter and, after enjoying a hard earned bottle of water, I descended the trail, camera in hand to go and see what all the fuss was about. My wife agreed that we would take it in turns to go and investigate the famed vista and waited with the children whilst I disappeared.

The view from the point is nothing short of spectacular. It reminded me of the feeling I had the first time that I went to the Grand Canyon and looked out at that enormous chasm in the earth. Nothing prepared me (or could have done for that matter) for the sheer scale and majesty of that sight. The sheer size and vastness of the canyon as the red and orange stone drops away from you is awe inspiring.

But in some ways it is also a little surreal because it feels almost unreal when considering the statistics of the canyon. The Colorado River looks like a small stream but it is a mile down in the canyon and has an average width or around 300 feet.  The length of the canyon is around 280 miles which is 80 miles further than where I live in the North of England to London. That’s a 4 hour drive or 2 hour train journey away. It is around 18 miles wide rim to rim – Yosemite Valley itself by comparison seems small at only 8 miles long. To me these distances are difficult to assimilate whilst you stand and take in the majesty of this natural wonder.

On the other hand Yosemite Valley and Taft Point is not on such a huge scale. The reality of the fact that you are standing, precariously in some ways on a 3,000 ft high block of granite seem to hit home that much harder. I have to confess that I have never been afraid of heights and yet when I peered over the edge and saw that there was nothing between me and a long, long fall during which time I would have plenty of opportunity to empty my lungs of scream after scream before my body splattered into the rock. With the Grand Canyon I felt there was a crumb of comfort in that if you fell there would a ledge or two that would break your fall and possibly save you from certain death. With Taft Point you know that there would be no second chances.

IMG_8886
Stunning Yosemite

And so it was that I found myself gripping onto the rail near the edge slightly harder than I would normally and marvelling at the incredible scale of the valley and breath-taking vista. The number of superlatives to describe this place quickly ran dry. I turned to see in the distance my family, tiny dots on the mountain side where they awaited my return. I stuck a hand up to wave and watched them wave back. It was sad that I hadn’t been able to take my son all the way down to the edge, especially after coming so far. I was also aware though that if my boy had been able to make it, so would my 3 year old and I know that I would have had to have maintained a vice like grip on her as she would surely have been too tempted to peer over the edge.

Looking over the valley, I imagined John Muir, back pack filled with bread, tea and a blanket as his only provisions, standing at this point and resolving to protect this area for all time. He spent a great deal of his life investigating the valley and it’s surroundings recording and publishing his findings in the hope that he could inspire people to see this natural wonder and nature itself in a new light and not just as an opportunity for profit and gain. He battled to have the park protected as he watched the lumber companies and farmers slowly erode the lowlands surrounding the valley destroying the meadows with their abundance of wild flowers.

He managed to convince no less than an American President – Theodore Roosevelt – to segregate the valley and surrounding area and make it one of America’s first national parks thereby inspiring a change in attitude and philosophy that generated the National Park system that is in existence today.

At this height you look down on the granite monolith that is El Capitan. Down to the valley to the Merced river below. The railing at the end just doesn’t seem substantial enough and one could imagine a gust of wind could lift you from the lofty perch and deposit you over the edge in an instant.

I quickly absorbed and photographed as much as I could and then followed the path back to where the family had been patiently waiting. Whilst my wife and elder daughter made their way down toward the Point to experience the natural wonder for themselves, I gave my son a full debrief in as much detail as possible and showed him the photographs. Today this was the best that I could do.

Tomorrow, would bring new challenges. Everest anyone?

Fuji X-E1 – Compact System Brilliance

fujifilm-x-e1-18-55mm-f2_4
When I told my wife that I was to go from the Canon 5D MkIII to the Fuji X-E1 she thought I had lost my mind.

Why did I do it? Well for several reasons.

Firstly, I grew tired of a DSLR’s bulk. I am no professional photographer by any means but on days out I do like to carry a camera everywhere with me. Whether in or out of a bag the Canon simply becomes unwieldy and tiring (or rather tiresome) to lug around.

As I stated above I am not a professional photographer so why take a pro camera around with me? I wanted a camera that would give me images that I could ooh and aah over but not where I would need to be submitting the images to National Geographic. I want images that are good enough for me and can take some tweaking in Photoshop. I don’t need to have file sizes that I can aggressively crop and still be able to print off A1 sized prints.

I don’t shoot sports (so no need for dozens of focus points, focus options or super fast frame rates), I don’t shoot wildlife so no need for the capability to strap on huge telephoto lenses. In fact I want to be able to keep lens changes to a minimum or not at all. I used to tire of dust spots on my sensor and having to touch images up and repetitively clean the sensor after being out for the day.

DSCF0966

No, my personal brief was for a camera that would provide me with excellent image quality – edge to edge sharpness, great colour out of the camera, light, easily portable, no temptation to try out a dozen primes to squeeze the best image quality from that full frame sensor (because in my experience unless you do you are missing out on what the 5D’s sensor can produce). 

After trying a number of CSC’s over the years including the Sony NEX 5n and Olympus E-P3 both of which were okay the Fuji X-E1 seemed to fit the bill with the kit zoom lens. Incidentally, saying the 18-55 is a “kit” lens does it an injustice. Most kit lenses I have used be they from Nikon, Canon or Pentax are invariably average at best. The Fuji 18-55 on the other hand is superb and worthy of its almost £600 price tag if bought separately.

Anyway, with the 5D gone I was left with this small, portable and light camera package that I was hoping would deliver.

And, boy does it.

It has been compared to full frame cameras and fared extremely well despite the perception that the bigger the sensor the better. Fuji, when the sensor was first released, suggested that it was better than that found in the 5D Mk2. Take this as typical marketing headlines but I have owned the 5D Mk2 and Mk3 and I do not feel short changed by the Fuji in any way.  

Another comparison was by Steve Huff. He compared the Fuji with the Sony RX1 and found that in good light he preferred the Fuji and in poor light the Sony. He also preferred the build quality of the Sony.

DSCF1036

What frustrates me with this review is that he doesn’t mention that the Sony with a prime Zeiss lens strapped to the front, a full frame sensor and a retail price over two and a half times that of the Fuji should be better. A lot better. In fact if I had the Sony I would expect it to trounce the X-E1 in EVERY area. Not just one or two!!            

In some ways this comparison was a lot like the comparison in high end audio. The more money you spend my get you a better made component with beautiful brushed steel finish or real wood veneers but the engineering inside the boxes is similar a lot of the time and the sound not significantly better.

So back to the X-E1. It fits the bill in terms of size and weight and convenience. It challenges some of the best cameras around in terms of image quality.

DSCF1113

So what are the downsides?

For me there are none. Really!

For other users, however, they may find the following slightly disappointing:

  • Build quality. Without the battery and lens the camera feels a little lightweight and it is clear the materials used are not the same as the X-Pro 1. Don’t get me wrong fully loaded it feels solid in your hands but without it could prove a disappointment.
  • Video quality. This is just average. At the end of the day this is clearly designed as an image making machine and not a replacement for your video recorder. Expect slow focus and occasional rolling shutter artefacts.
  • Lenses. Compared to the likes of Sony, Panasonic and Olympus reasonably priced lenses are hard to come by.

I have no issue with any of the above. I did not buy the camera as a lightweight alternative to a DSLR only to then fill my bag with assorted lenses. There is a lot to be said to with sticking to one camera and one lens in terms of improving your creativity. In any case the 18-55 lens does everything I want and I am more than happy. In fact I am delighted with the image quality.

Once my wife saw the quality of the X-E1’s images and the fact I wasn’t lugging a huge Billingham bag full of gear on holiday she finally got it.

Good job too!

Sigma DP1x – A Pocket Imaging Marvel?

sigma_dp1x

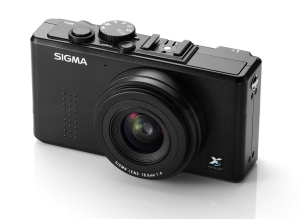
Sigma DP1x

I recently came across this camera for an extremely affordable price and decided, based on its almost cult status being capable of capturing superb images, to snap it up (sorry for the pun).

I was interested in discovering if it produced the kind of world class images it was purported to be capable of and also whether the frustrating elements of the camera – slow to operate, slow write times, slow autofocus and write to card, poor high iso performance, average build – were accurate.

To cut to the chase I can confirm that the images the camera produces really are superb with wonderful colour and sharpness. The 3 layer Foveon sensor – a Google search will provide a ton of information on the technical aspects if this device – is a significant departure from those used by the competition.

SDIM0370

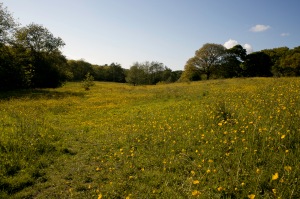
The DP1x captures colours nicely

The comments that it is close to a film camera in the way it resolves colours and more importantly the visual feel are, I feel, accurate. This performance coupled with the super sharp fixed 28mm (equivalent) lens means that its output exceeds that of my Fuji X-E1 and 18-55 lens which is no slouch in these areas.

But there is I am afraid a “however”. There usually is but the caveats to this camera producing  the kind of images that when you get them on your computer screen make you go “wow” are as long as your arm.

Get the camera in the right conditions and you will be amazed. And by right conditions I mean generally outside, on a bright day (without any sun on the screen as the preview fades dramatically in bright light), with low iso (200 or less), on a static subject and ideally with manual focus to get things just so. Oh and a tripod would probably help as there is no inbuilt image stabilisation.

SDIM0221

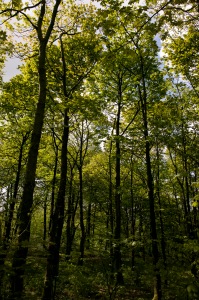
Nice detail from the fixed lens/sensor combination

As stated previously if you can comply with virtually ALL of the above (maybe forgo the tripod if you can get your shutter speed up) then you will be richly rewarded with images that have a quality I think you would struggle to achieve with anything up to a Canon 5D Mk3. Not print as big as the side of a house quality but up to A3’ish with some tweaking kind of quality (and yes I have owned a 5D Mk3 and I am fully aware of the files it produces).

As for the build quality. It feels fairly solid but strangely light to me. Build quality is certainly not going to blow you away. It feels no better than a £200 point and shoot from the likes of Canon or Nikon and as the camera’s original retail price was around £600 then I think it will leave many disappointed.

SDIM0332

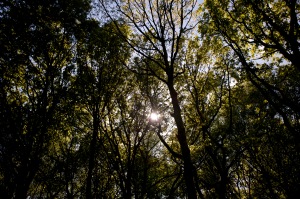
I feel it handles this scene well

Operationally it is very straightforward which makes a refreshing change with a mode dial on top for “P, A, S, M” shooting, set up, video and voice recording (!?). The remainder of the settings are fairly simply laid out after pressing the menu or quick menu buttons on the back of the camera although these have their own quirks that have to be experienced to be believed.

So who would the camera be good for? I would suggest landscape and architectural photographers that want to produce world class, fine art prints sized A3 or smaller. Forget portrait photography primarily because the focal length does not lend itself to this type of photography. In fact I would forget any other type of photography other than the ones mentioned previously.

Incidentally, forget the video capabilities of the camera – I am at a loss as to why Sigma even bothered given the performance here.

I would love to try out the new Merrill DP cameras out to see if any of the niggles have been ironed out. Until then I will be moving the DP1x on as, for me, its quirks just about outweigh the positives.

SDIM0243


Colours are still good in overcast conditions

Format FOVEON X3® Direct Image Sensor (CMOS)
Image Sensor Size 20.7×13.8mm (0.8 inch×0.5 inch)
Number of Pixels Effective Pixels 14.06MP (2652×1768×3 layers)
Aspect Ratio 3:2
Focal Length 16.6mm F4 (35mm equivalent focal length: 28mm)
Lens Construction 5 Groups, 6 Elements
Shooting Range 30cm–∞ (Full Mode),50cm–∞
Storage Media SD Card/Compatible with SDHC,Multi Media Card
Recording Format Exif2.21, DCF2.0, DPOF
Recording Mode Lossless compression RAW data (12-bit), JPEG(High, Wide, Medium, Low), Movie (AVI), Voice memo to still image (10 sec./30 sec.), Voice recording (WAV)
File Size (Number of Pixels)
For Still Images
RAW High Approx. 15.4MB (2640×1760)
JPEG High Fine Approx. 3.3MB (2640×1760)
Normal Approx. 1.9MB (2640×1760)
Basic Approx. 1.4MB (2640×1760)
Wide Fine Approx. 2.7MB (2640×1485)
Normal Approx. 1.6MB (2640×1485)
Basic Approx. 1.2MB (2640×1485)
Medium Fine Approx. 1.6MB (1872×1248)
Normal Approx. 0.9MB (1872×1248)
Basic Approx. 0.7MB (1872×1248)
Low Fine Approx. 0.8MB (1312× 880)
Normal Approx. 0.5MB (1312× 880)
Basic Approx. 0.3MB (1312× 880)
File Size/Movie QVGA:320×240 (30 Frames Per Second), Approximately 30minutes is possible with a 1GB SD Card.
White Balance 8 types (Auto, Sunlight, Shade, Overcast, Incandescent, Fluorescent, Flash, Custom)
ISO Sensitivity AUTO (ISO 100–ISO 200): With Flash (ISO 100–ISO 400) ,ISO 50, ISO 100, ISO 200, ISO 400, ISO 800, (ISO 1600– 3200 in Raw mode only)
Color Mode 7 types (Standard, Vivid, Neutral, Portrait, Landscape, B&W, Sepia)
Auto Focus Type Contrast Detection Type
AF Point Selection Selection of 1point from 9points
Focus Lock Shutter release halfway-down position (From Menu Settings AE Lock is possible by AE lock button)
Manual Focus Dial Type
Shutter Type Electronically controlled lens shutter
Shutter Speed 1/2000sec to 15sec: The maximum shutter speed is varied depending on F value.
Metering System TTL Full Aperture Metering [1]Evaluative Metering, [2]Center Weighted Average Metering, [3]Spot Metering
Exposure Control System [P]Program AE, [S]Shutter Priority AE, [A]Aperture Priority AE, [M] Manual
Exposure Compensation 1/3 EV Steps up to±3EV for Appropriate Exposure
Auto Bracketing 3 pictures in appropriate, under and over exposure levels. It can be set in 1/3EV stop increments up to ±3EV.
Built-in Flash Pop-up (Manual)
Guide Number 6(ISO100/m)
Built-in Flash Coverage Range 30cm to 2.1m (ISO200)
External Flash Hot shoe (X Sync. Contact, dedicated contacts)
Drive Modes [1]Single, [2]Continuous (3 Frames/second), [3]Self Timer (2sec./10sec.)
LCD Monitor Type TFT Color LCD Monitor
Monitor Size and Pixels 2.5inches / Approx. 230,000 dots
LCD Monitor Language English/Japanese/German/French/Spanish/Italian/Chinese (Simplified)/ Korean/ Russian
Interfaces USB (USB2.0), Video Out (NTSC/PAL),Audio Out (Monaural)
Power Dedicated Li-ion Battery BP-31, Battery Charger BC-31, AC Adapter (Optional)
Battery Life Approx.250 shots(25℃)
Dimensions 113.3mm/4.5″(W)×59.5mm/2.3″(H)×50.3mm/2″(D)
Weight 250g/ 8.8oz. (excluding batteries and card)
DP1x Accessories Li-ion Battery BP-31, Battery Charger BC-31, Lens Cap LCP-11, Neck Strap NS-11, Soft Case CS-70, Hot Shoe Cover HSC-11, USB Cable, Video Cable, SIGMA Photo Pro Disc, Instruction Manual

Worldscape Photography

I thought it was worth pointing you in the direction of a sister blog to this one: worldscapephotography.wordpress.com

The site features a number of photographs taken on my travels over the years from Scotland to France to North America.

A number of the images featured on the Blog were taken with the cameras I have reviewed here.

It would be great if you could take a trip there and let me know what you think.

Thanks!!

Russell Sherwood Photography – Capturing Skye in All It’s Glory

Other than lochs, mountains and waterfalls one other thing that Skye is certainly not short of is artists and photographers.

Being an enthusiastic amateur photographer myself I was extremely keen to see how a working photographer captured such a dramatic landscape with it’s rapidly changing light and weather.

Whilst out and about (and if the opportunity presented itself) I would pop into one of the galleries to see the photographer’s work. To my eyes the best of these has to be Russell Sherwood’s near Dunvegan in the north of the island.

My first instinct when viewing his work is that he was using Medium Format cameras. Russell is happy to discuss the equipment he uses and by any professional standards it is primarily straightforward stuff. His website has all the details of his camera gear and so I won’t go steal his thunder here.

What really struck me is that when it comes down to it, it is the photographer and their ability to “see” the image and opportunity.  Cameras don’t take bad photographs. People do.

Russell has built up a portfolio of incredible images which totally capture spirit of the landscape of Skye and if you are ever in the area I doubt you would be disappointed by a trip there. His website is also well worth investigating: http://skyescapegallery.zenfolio.com/

Highly recommended.

Olympus E-P3 – Top of the CSC’s?

The E-P3 is a stunning looking camera with a retro appeal

When I first laid my hands on the new Olympus E-P3 and 17mm lens I just wanted to like it. The look and feel of the solidly built metal body oozes a similar quality to the Fuji X100. In some ways, it feels more substantial and robust than the X100 and is certainly a better experience to handle than the Leica X1. High praise indeed.

On a purely aesthetic note the packaging leaves a lot to be desired. I think that Fuji and Leica got it right with the quality of the packaging for the X100 and X1. When you opened the boxes of those cameras you felt like you had bought into a prestigious product. Okay, those boxes would eventually find there way into a cupboard to collect dust but it is a an indicator of the quality of the product within and pride of ownership. The P-3 with lens is similar in price to the X100 – exceeding the cost of the number of DSLR’s. . To me, as the flagship in the range , it should receive some special treatment.

The top of the camera is simple and functional

Putting this to one side and accepting that packaging is merely a side issue to the quality of what is actually contained in the box let’s move onto the camera itself.

To say that it is crammed with features is an understatement. 10 art filters each with subtle adjustments, 24 scene modes, various display configurations,  3 function buttons and a beautiful OLED touchscreen to name but a few.

To those who are less likely to tweak or see these extras as getting in the way of taking a good photograph something simpler like the X100 may appeal. Having said all this once the camera is set up to how you like it, other than having a play with the filters, you can snap away confident in the knowledge that the E-P3 is going to nail the exposure right each time. It has an uncanny ability of being able to do this better than a lot of other cameras I have used.

The E-P3 is capable of capturing stunning images 

Focussing is also lightning quick and extremely accurate. The touchscreen is a little gimmicky and I did not enjoy this on the Lumix G3 as I feel you introduce too much movement in the camera to get an acceptably sharp image. It is also difficult on the G3 to operate the camera without using the touchscreen. The E-P3 is different as all controls can be accessed through the buttons and dials with the touchscreen adding the tactile functionality if you want to use it.

Swiping through the photos you have taken though is fun, for example,  providing an almost Apple type experience. The screen is very responsive in this regard.

Video quality is okay although I rarely use this function. I tried it a couple of times and as long as you kept fairly still with no excessive panning (too much of the “jello” effect otherwise) then for a quick video the results are fine.

The Grainy Film Art Filter gives a very interesting look

So as an alternative to a big DSLR it is to me a winner. So long as you keep the ISO at 800 or less (there is too much noise above this level)  I cannot see how you would be disappointed with the image quality. The art filters are fun (although I would prefer it if the camera kept an unfiltered copy too for one’s own post processing experiments) and handling is straightforward.

All in all highly recommended and easily the best CSC I have used to date.

The Lumix G3 – What is the point?

The Lumix G 3 and Kit Lens

In my quest to find the perfect companion camera to the Leica M9, I picked up Lumix G3, 14-42 kit lens and 45-200 telephoto.

It was a slightly bigger camera than I was intending to acquire but it had several features that, at the time of purchase I thought would be practical and interesting to utilise: viewfinder (albeit electronic), articulated touchscreen, fast AF, 4 frames per second shooting, smaller than a DSLR . The fact it was able to cram these into a body not much bigger than the Lumix GF1 seemed to me a miracle of design and engineering. Okay, maybe not a miracle but certainly clever.

I am going to keep this review short and sweet. Before I launch into my thoughts and feelings though a couple of qualifications are in order here. Firstly, this is my opinion of how the camera worked for me. Secondly, If you have the camera and disagree with everything I have said then cool. Thirdly, If you are thinking of buying the camera then I suggest you try it out first in store first to ensure that you are 100% satisfied that it ticks all your boxes. Finally, yes I know that these features are available on other cameras but for me, having experienced what is arguably the best implementation of these features I would steer clear in future.

The most positive thing, other than it’s size, that I can say about this camera is that the image quality is pretty good with the 45-200 lens. The kit 14-42, whilst supremely fast in the focussing department, is not as good as the 14-45 GF1 kit lens. Not as well built (plastic mount for a start), not as sharp, softer etc. I am not sure why, other than price, Lumix decided to mess with the 14-45.

The 14-42 kit lens – optically inferior to the 14-45

All the aspects that I was looking forward to taking advantage of were either a hindrance or ultimately pointless:

· The viewfinder. For a start it is electronic and I knew this. In bright light it is pretty good. As the light starts to fade so does the performance. The image becomes grainy and wobbly and not pleasant to look at. Also, to get the 4 fps you need to use the view finder which for action is next to useless as it shows a split second view of the shot you have just taken. Not very useful for tracking a subject at all.

· Articulated screen. What’s the point. Okay, I know what the point is. I had expected to love this feature. The ability to be able to hold the camera at various angles, tilt the screen so you can see the image and take the shot. What should have been obvious is that it is virtually impossible to keep a camera steady enough when holding above your head or away from you body to achieve acceptable sharp shot.

· Touchscreen. Don’t get me started. There seems to me to be too much reliance on this to enjoy using the camera. Also the feature where you can touch the screen and it will immediately focus and take the shot seems clever at first but then, as with the screen you find yourself creating too much camera movement with this action to properly take an acceptably sharp image.

· Handling. The camera is too small for how it is intended to be held. The buttons on the back of the camera on the right hand side are right below your palm when you are holding the camera. I found that when held it with one hand I would inadvertently press these buttons bringing up menus that I never intended.

The Lumix 45-200 – better built than the kit lens with superior performance

So to return the question in the Blog title: what is the point of the G3? I am not so sure. It seems to be pretending to be a DSLR and compact system camera at the same time. For me I cannot see why you would want to by the G3 over an entry level Canon, Nikon or Pentax DSLR. I also cannot see, now, why you would want to have the larger size of the G3 over the GF3 or E-PL2/3. Extra pixels means potentially better image quality and so if this is important to you go for the entry level DSLR.

I apologise to any G3 owners out there. I truly hope that it serves you well. For me, though, I just cannot see the point of it………..

Leica X1 vs Fuji X100 – The Imaging Wars – Final Thoughts

I have now been playing around with the X1 and X100 for a couple of weeks now and, to be honest, finding it very difficult to chose between the two cameras.

As an aside, the images in the original blog had Leica first and Fuji second in each of the aperture comparison shots.

With regards to the two cameras, on the one hand I find the simplicity, image quality and, in a totally fickle way, the red dot of the Leica brand make the X1 extremely appealing.

Then I pick up the Fuji X100 and find it hard to resist the combination of retro looks, image quality, flexibility and high ISO capabilities,

But, the intention of this blog, as is more than suggested by the title, was to focus on the imaging prowess of each of these cameras. And so I must put aside looks, brand and facilities and concentrate on the main aspect that will determine which of these cameras will remain as companion to the M9.

Having looked at the images I have been getting from the two cameras I have found myself consistently coming down on the side of the Leica.

On first look I love the punchy colours that the Fuji produces . This is especially apparent when viewed side by side with the Leica’s output. Don’t get me wrong the X1 produces beautiful colours but on first glance they are a little subdued. It is not hard to do some tweaking in Lightroom or Aperture but I would prefer to get the image out of the camera as close to what I want rather than fiddle around on my laptop.

After a while I have come to realise that the images the Leica produces are, to my eyes, more natural and closer to the truth of what I see. I also believe the the Leica images have more of that 3D quality that seems unique to Leica (and Zeiss ) lenses. The Fuji images look a little flat to me. Still incredibly good and comparable to the Canon 5D I had. The problem is that they just don’t seem to speak to me like X1 images do.

Throughout the course of looking at these two cameras I was really, really hoping that I would grow to love what the Fuji produces. And in lots of ways I do. It is just that I think the Leica has the slight edge to me.

So bottom line will I be keeping the X1. Err, no. So I will be keeping the X100 then? No, again. I am going to be selling both cameras for the pure and simple reason that I want to spend more time with the M9 getting as much as I can out of it. Whilst I am used to the rangefinder style of shooting now I want to get better at it and it be more instinctive and natural when taking photographs.

In the meantime maybe Leica will come out with an X2 and surprise us all with a camera that takes what Fuji has done in terms of style and build and incorporate a Leica lens. Hang on, surely that’s an M9 I am talking about? It is, but the ultimate in quality comes at a price and, perhaps perversely, functionality. Maybe Leica will come up with an M9-lite version? Who knows.

All in all I think that Fuji can be congratulated for taking a brave step to develop the X100. It isn’t original in terms of design but it is in terms of application. It has demonstrated to other manufacturers what can be achieved in these fundamental areas.